Pan Spread(0〜100%)で左右の広がり、Delay(0〜100 ms)で加工音だけの遅れを調整します。
Mixで原音と加工音の比率を調整します。0%は原音のみ、100%は加工音のみです。
Use Voices (1–8) for the voice count, Time Spread (0–120 ms) for timing differences, and Pitch Spread (0–120 cents) for pitch differences. At 0 ms, Time Spread disables the pitch differences.
Use Pan Spread (0–100%) for stereo width and Delay (0–100 ms) to delay only the processed signal.
Set the dry/wet balance with Mix: 0% is dry and 100% is processed audio.
In FREE, set Time from 0 to 2000 ms. In SYNC, choose from 14 note values from 1/1 to 1/32, including dotted (D) and triplet (T) divisions. Moving Time switches to FREE.
Use Feedback for the length of the repeats and Mix for the dry/wet balance. On a send, use 100% Mix for echoes only. Repeats do not decay at 100% Feedback.
Tap sets the delay time from your click interval. Ping Pong alternates echoes between left and right.
歯車のSample Storageで保存方法を選びます。Reference original filesは元ファイルを参照、Copy to folderは指定先へコピー、Embed audio in projectは音声を埋め込みます。Applyで確定し、新規インスタンスの既定にも保存します。
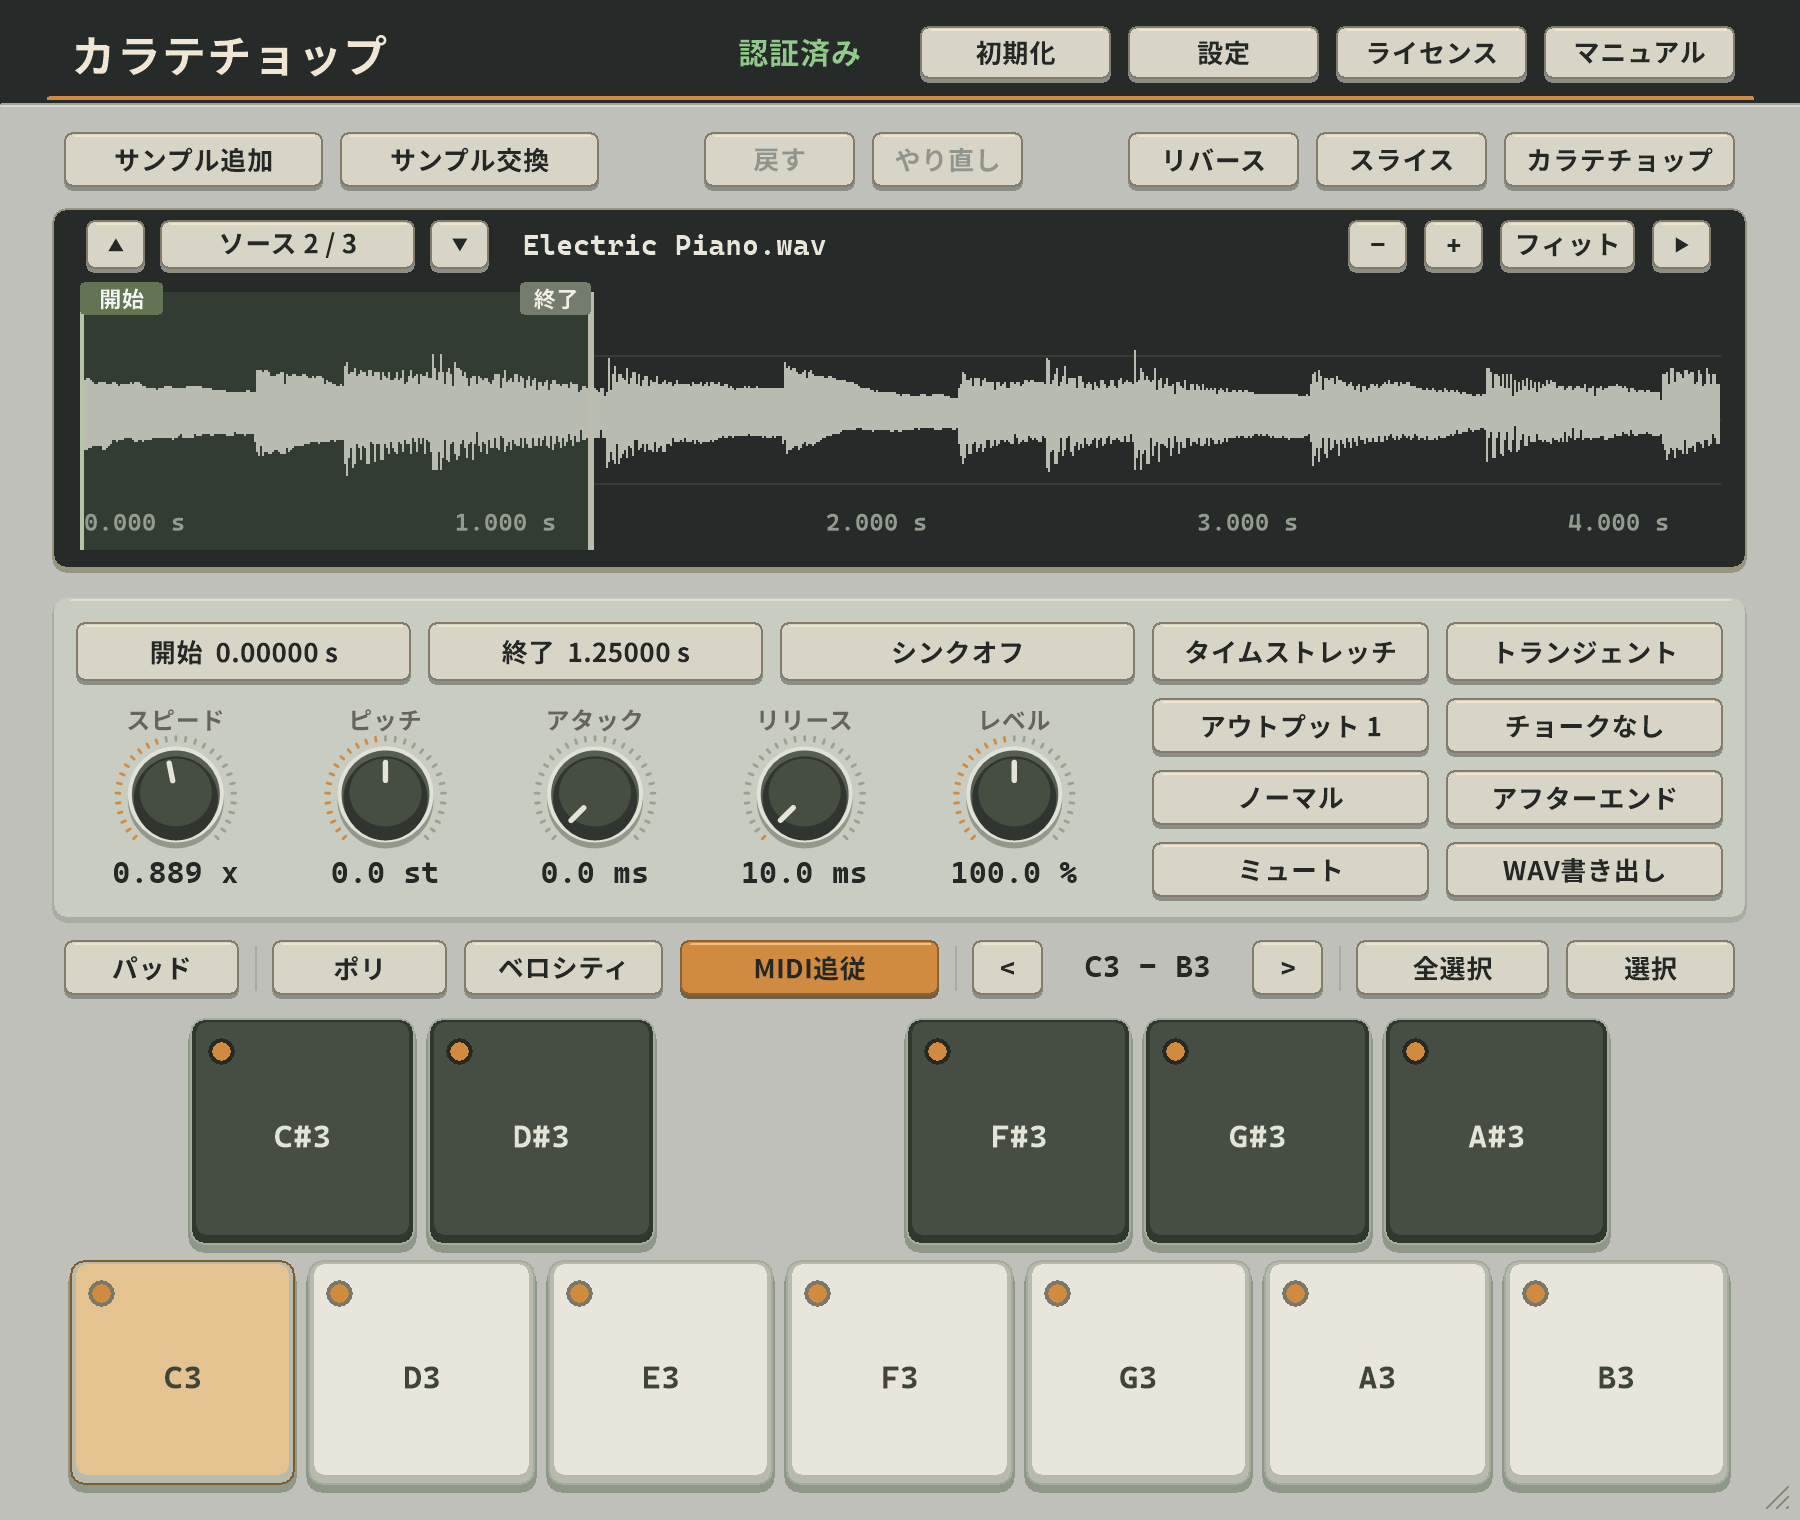
Select a key and load WAV, AIFF, FLAC, or MP3 audio with Load Sample or drag and drop. Play with MIDI or the on-screen keys. Multiple files are assigned to consecutive keys from the selected key.
Set the playback range with Start / End and shape the sound with Level, Pan, Tune, Velocity, and ADSR. MIDI Follow displays the settings of the key you play.
Use Choke to stop sounds in the same group and Output to choose their destination. Enable separate outputs in your DAW too.
Save kits from the preset menu. Export kit file creates a .kdrum file that includes the audio.
Open Sample Storage with the gear. Reference original files links to the originals; Copy to folder makes copies in your chosen folder; Embed audio in project stores the audio in the project. Apply confirms the choice and saves the default for new instances.
Drag slightly in an empty area of the graph or use + to add a band. Drag points to adjust frequency and gain; scroll to adjust Q.
Select a point, then choose its filter shape and channel routing below. Use Enabled to disable it temporarily or Delete to remove it.
In Customize, use Click regions to set the filter shapes and boundaries for new bands, and Band defaults for their initial settings. Press Apply to save.
View the input/output spectrum with Analyzer and adjust the output level with OUTPUT. SCALE adjusts Bell, Shelf, and Tilt gains together.
Compare settings with A/B and use Copy to copy the current setting to the other slot. Click the preset name to choose a preset, or use Save preset as… to save. Save each comparison setting separately to keep it.
A pitch shifter featuring high-quality time stretching. Change pitch without changing the duration, and blend the processed sound with the dry signal to create harmonies.
Open a bank with Open.... Extract ZIP or 7z archives first, and keep SFZ samples and their folder structure together.
Choose a folder with Browse..., a bank from the left list, and a preset from the right. Use the search fields to filter the lists, or hold a row’s ▶ to audition.
Play with MIDI or the on-screen keys. Use Output for volume, Pan for balance, and Transpose / Fine tune for pitch. Choose Poly in Mode for chords or Mono for single notes. Voices limits the number of simultaneous sample voices.
For SF2/SF3, Velocity mode uses the bank’s own response in SoundFont, or changes only the level while keeping the timbre in Volume only.
Set AMPLITUDE ENVELOPE to Manual and use Attack / Decay / Sustain / Release to shape the volume over time. Preset restores the bank’s original settings.
SF2/SF3 also supports pitch and filter changes over time with MODULATION ENVELOPE. SFZ supports only the amplitude ADSR.
Set FILTER to Manual, choose LPF to reduce high frequencies or HPF to reduce low frequencies, and adjust Cutoff / Resonance. This works with SF2, SF3, and SFZ; Preset restores the bank’s original settings.
For SF2/SF3, VIBRATO and LFO also shape the sound. Set the effect amount with REVERB / CHORUS Level. If the sound does not change, set SF SENDS to Manual and raise the sends too.
The other effects on this screen are unavailable for SFZ.
The DAW saves your preset and settings, without embedding banks or samples. Copy those files with your project. Locate missing banks with Find File or Search Folder.
Press STOP to slow down and stop, then START to accelerate again. Automate Trigger in your DAW for timed changes.
Set each duration with STOP TIME and START TIME. In SYNC, choose a note value to follow the tempo. Moving a time knob switches to FREE: 20–4000 ms for STOP and 0–4000 ms for START. A 0 ms START resumes immediately.
Use CURVE for the speed change and TONE for how dark the sound becomes while slowing.
In RESUME, LIVE returns to the current input when restarting; TAPE continues from the stopped position. TAPE with START TIME in SYNC aligns the restart position to the beat grid.
L / R SWAPで左右を入れ替え、PHASE INVERTで極性を反転、MUTEで出力を止めます。
SMOOTHで設定変更時の切り替わりを滑らかにします。
Choose Stereo, Left, Right, or Mono with INPUT MODE. Left / Right sends one side to both channels; Mono sends a mix of both sides.
Use WIDTH (0–200%) for stereo width: 0% is mono and 100% preserves the original width. WIDTH works in Stereo mode. Use PAN for balance and VOLUME for level.
Use L / R SWAP to swap channels, PHASE INVERT to invert polarity, and MUTE to silence the output.
Use SMOOTH to soften transitions when settings change.